How it works
A typical astrologer’s workflow, connected end to end.
Follow a client from first enquiry to a delivered reading — and into the next consultation. Every screen below is from the working prototype.
- 1Step 1 of 5
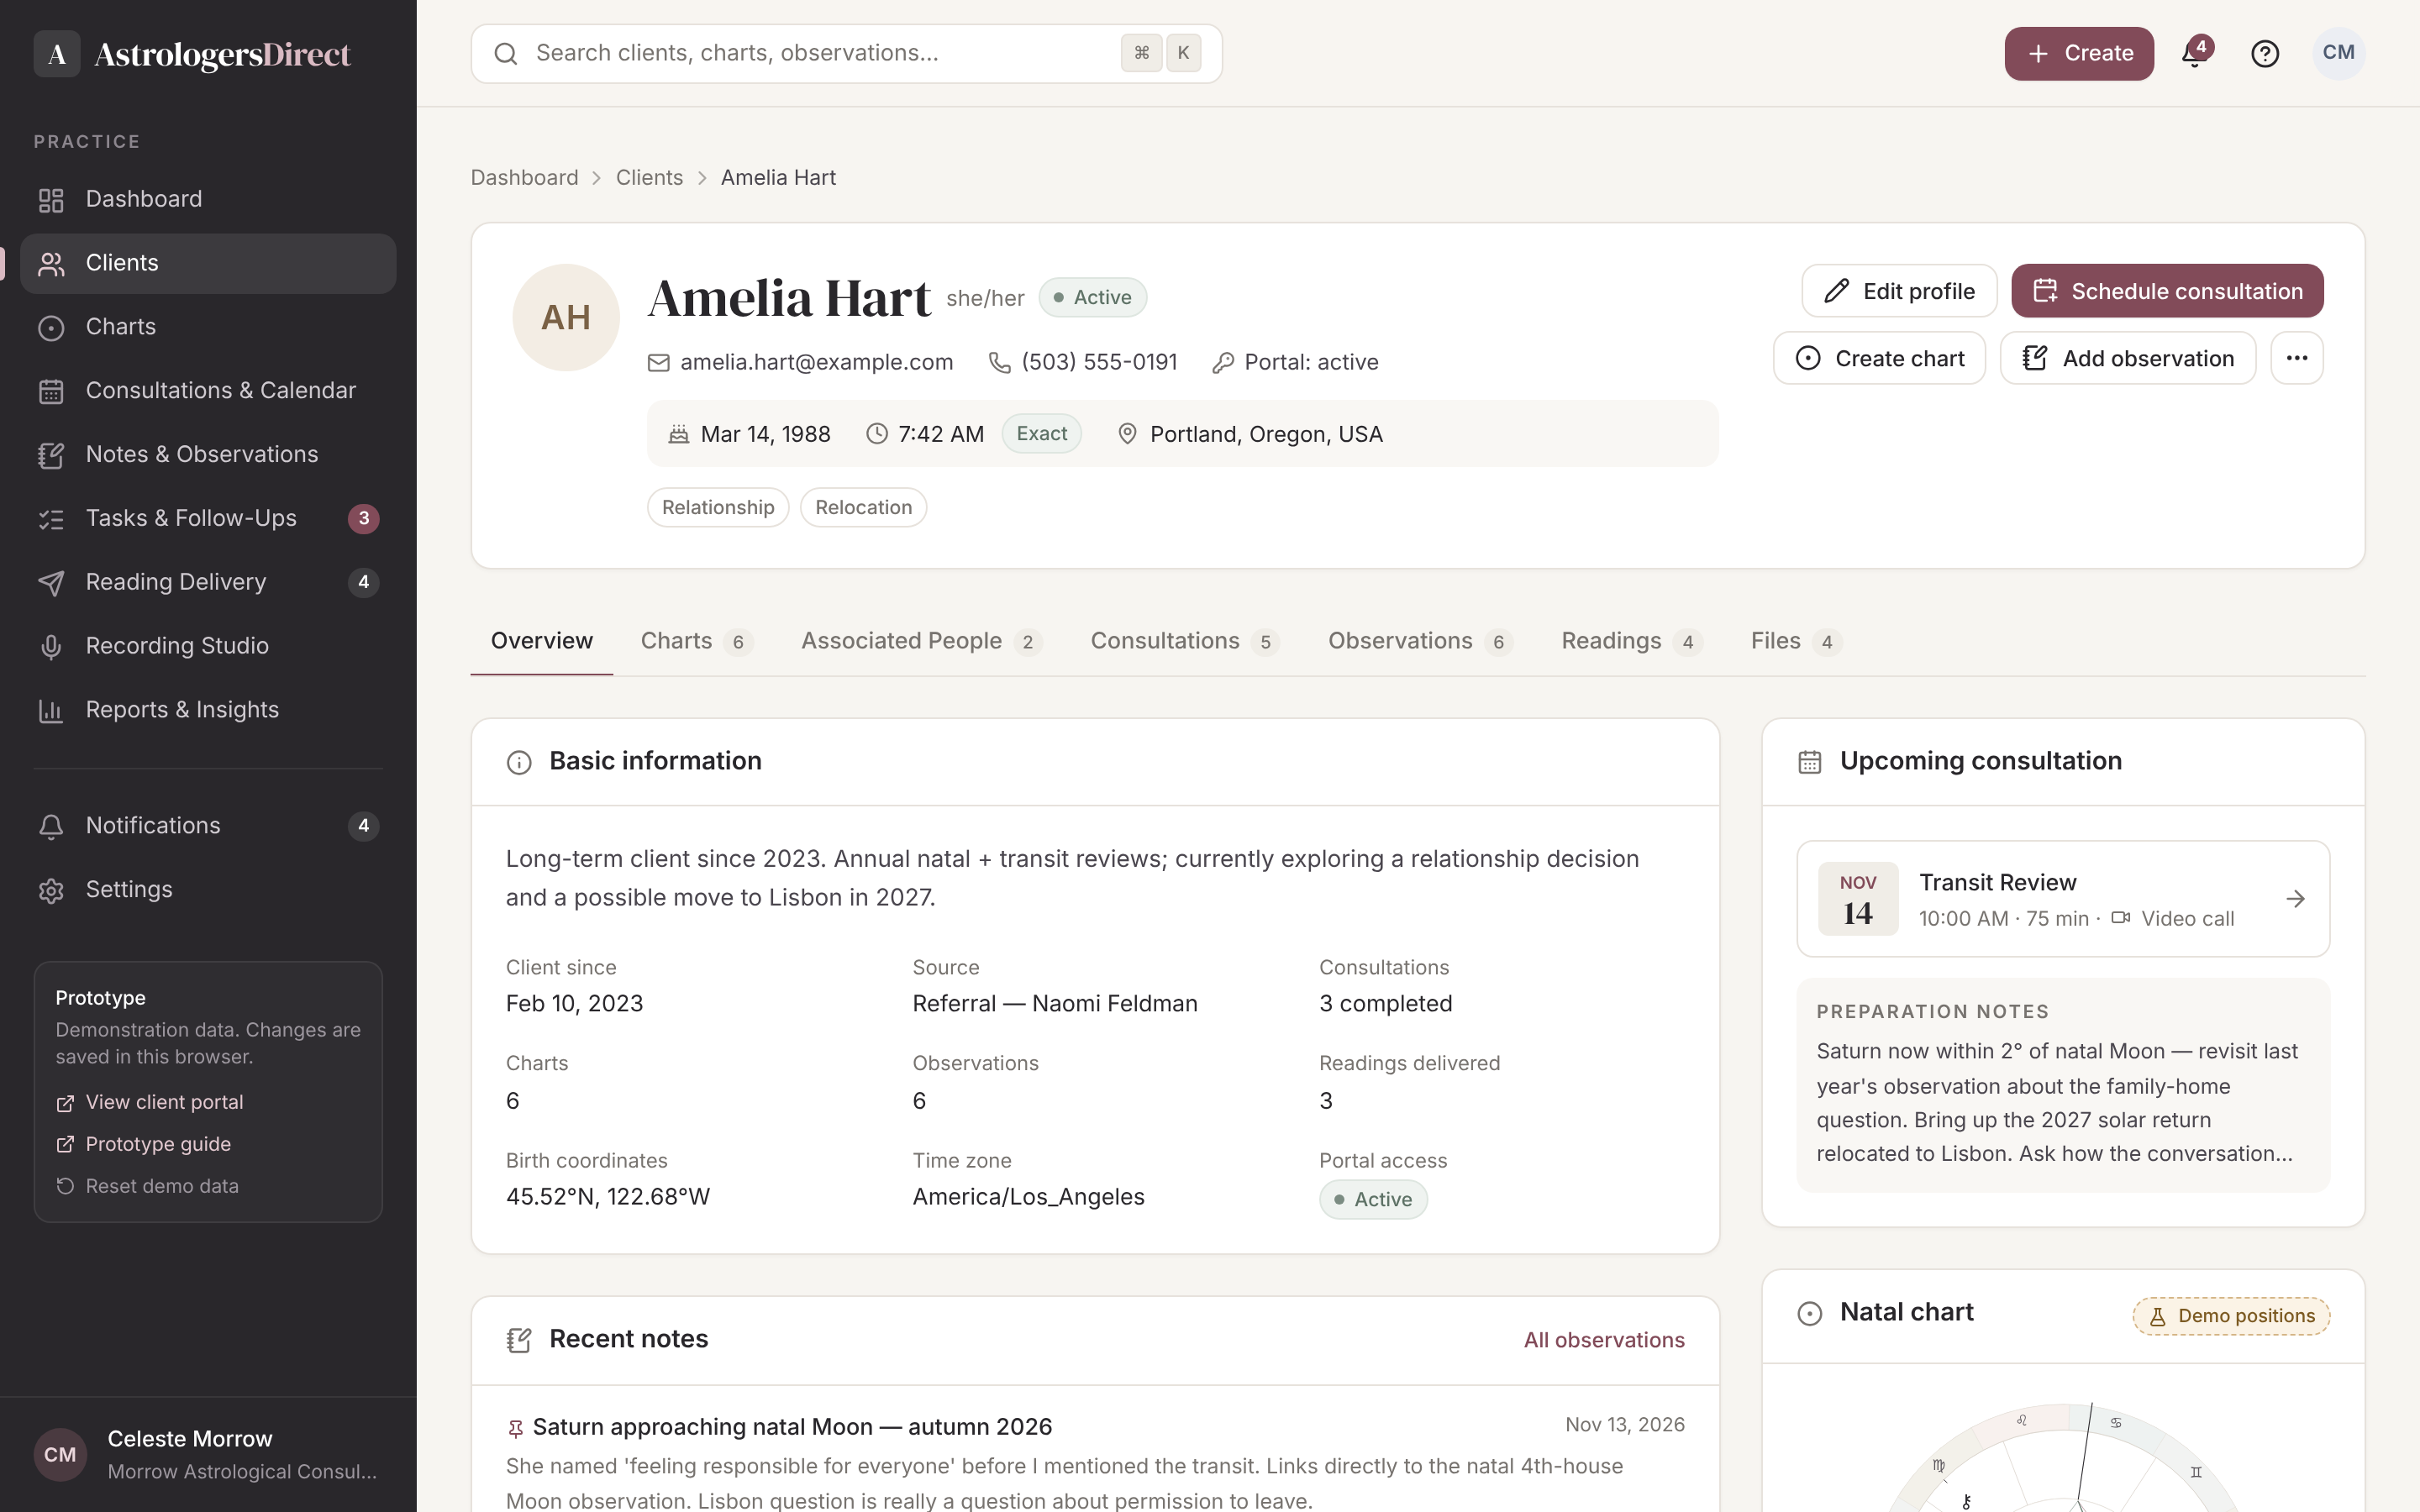
Create or import a client
Add a client with their contact details and birth data — date, time, place and how reliable the time is. Partners and family members can be added as associated people with their own birth data. Existing client lists can be imported.
- Birth-time accuracy recorded alongside the data
- Natal chart generated automatically
- Portal invitation when you’re ready
- 2Step 2 of 5
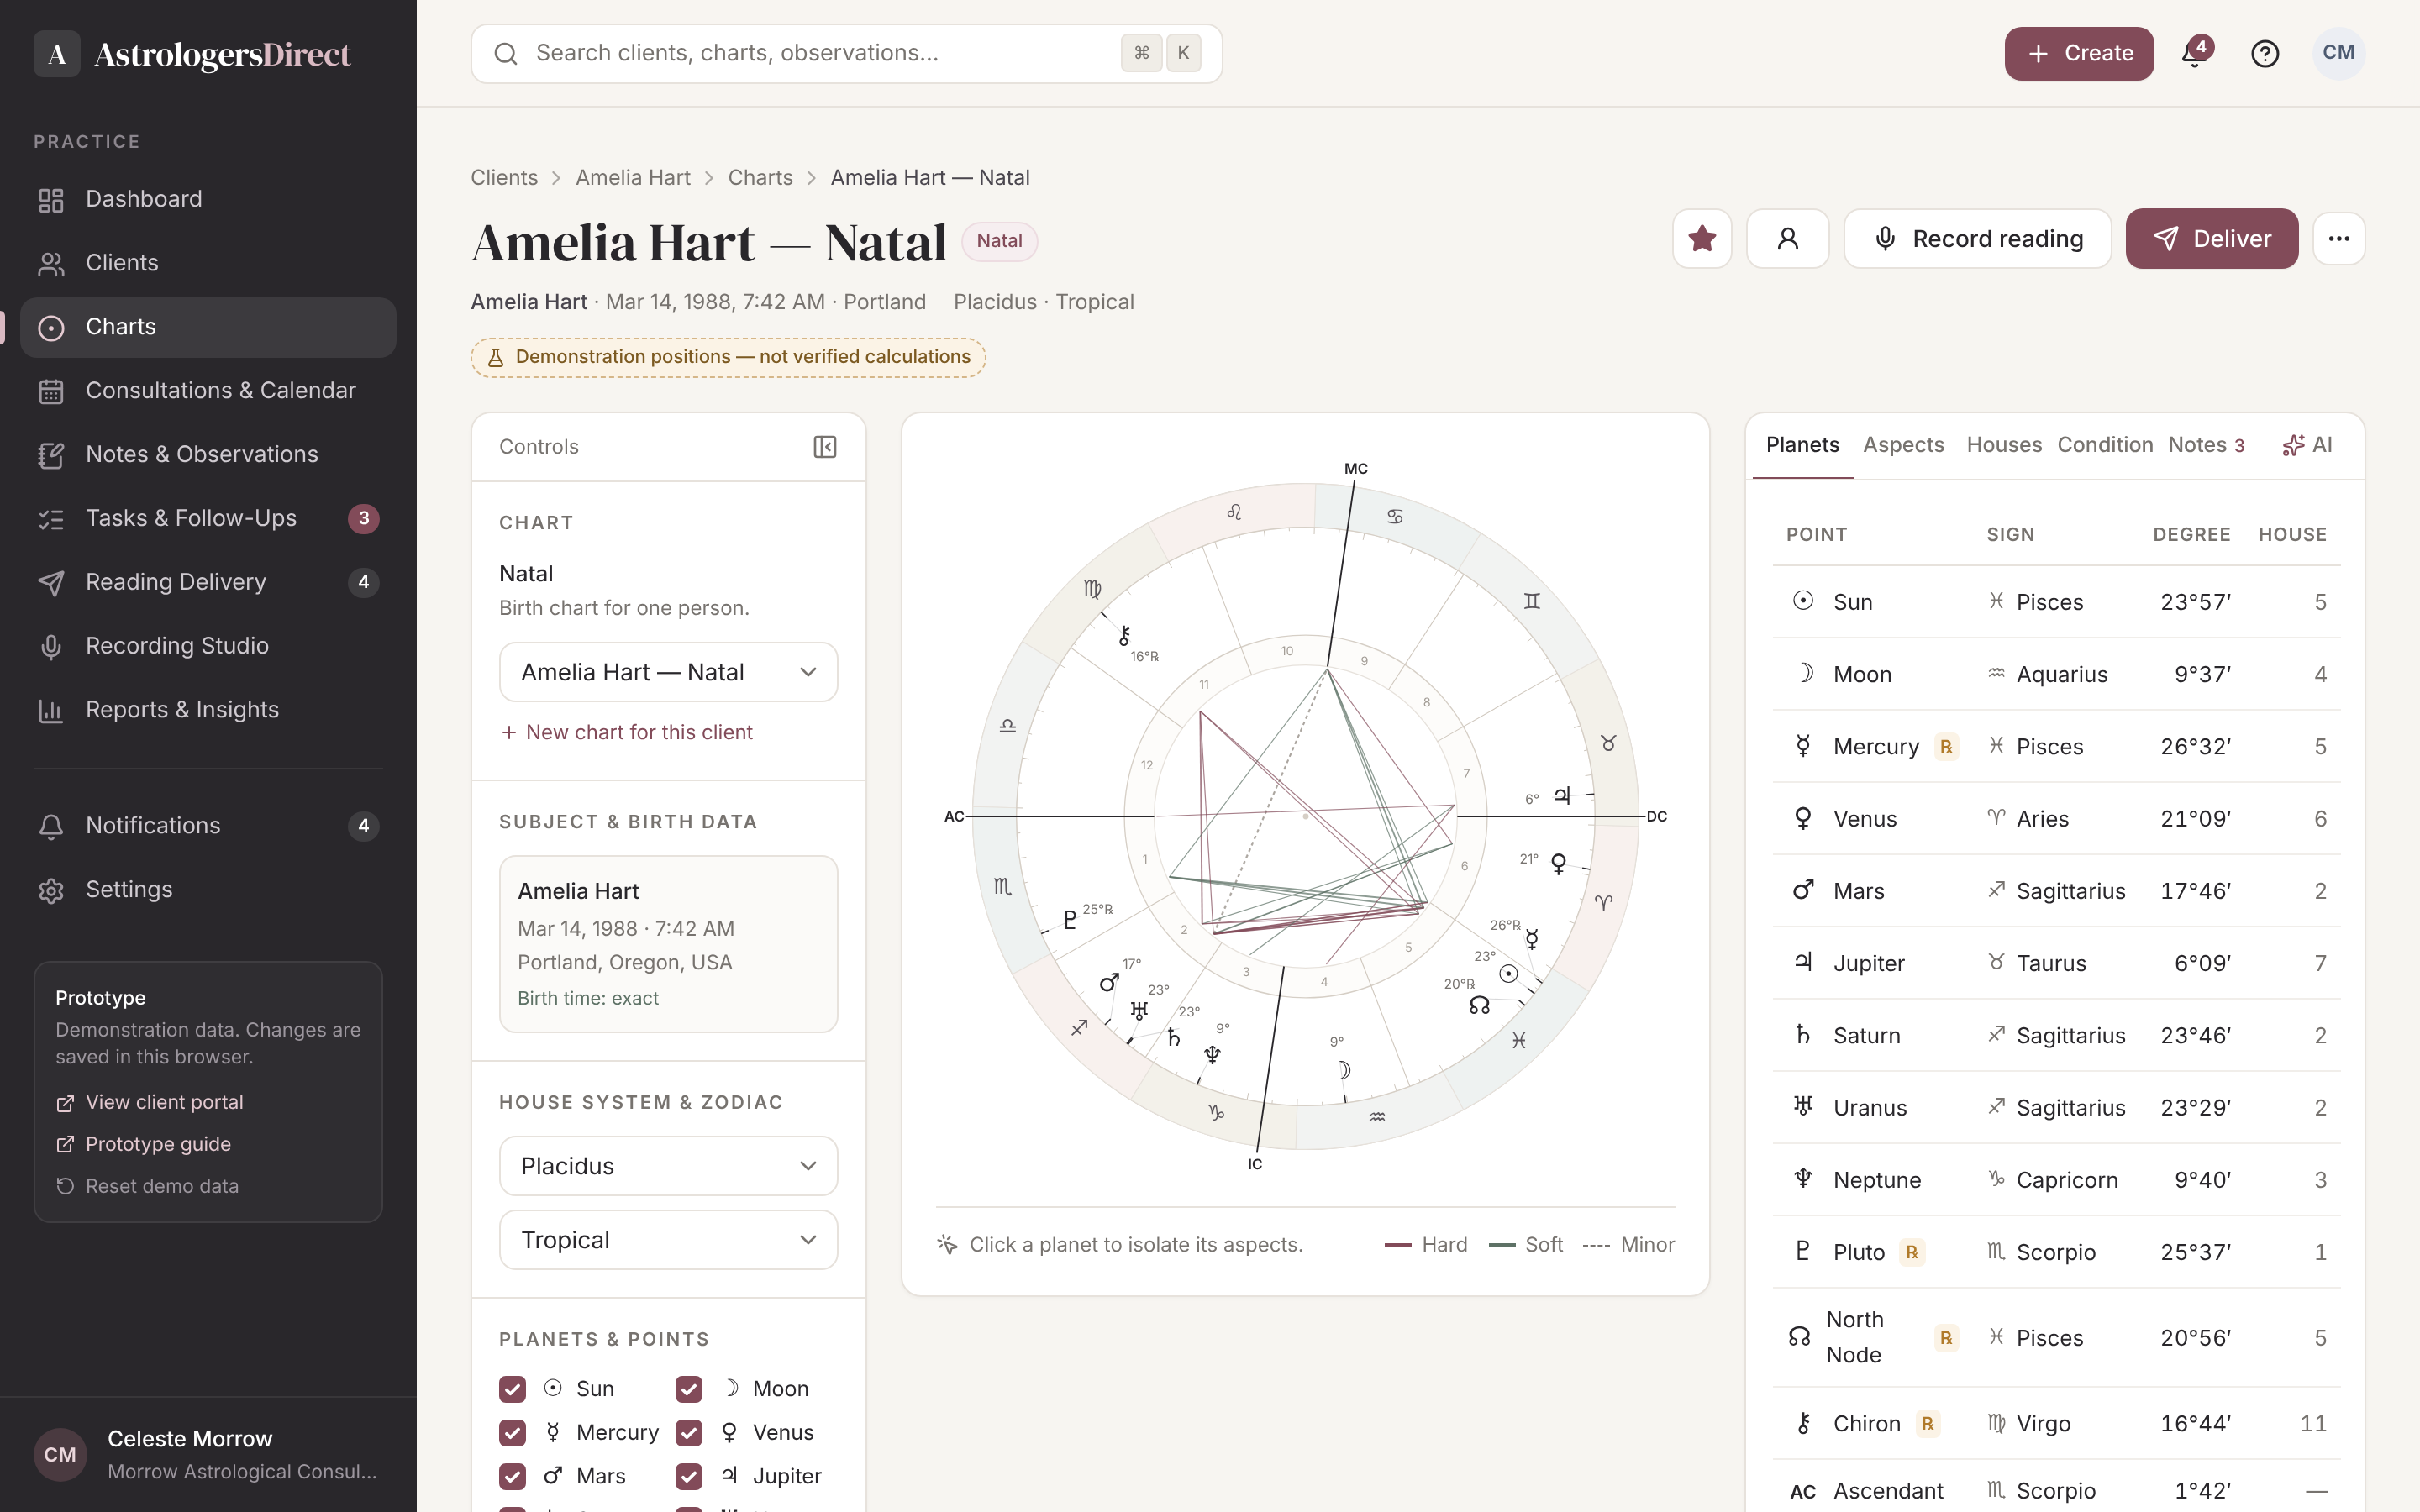
Generate and analyse charts
Open the chart workspace from the client profile. Review placements, aspects, houses and rulers, switch house systems, adjust orbs, or create synastry, composite and timing charts — all filed under the same client.
- Natal, relationship and timing techniques
- Calculated facts kept separate from interpretations
- Saved configurations for repeat work
- 3Step 3 of 5
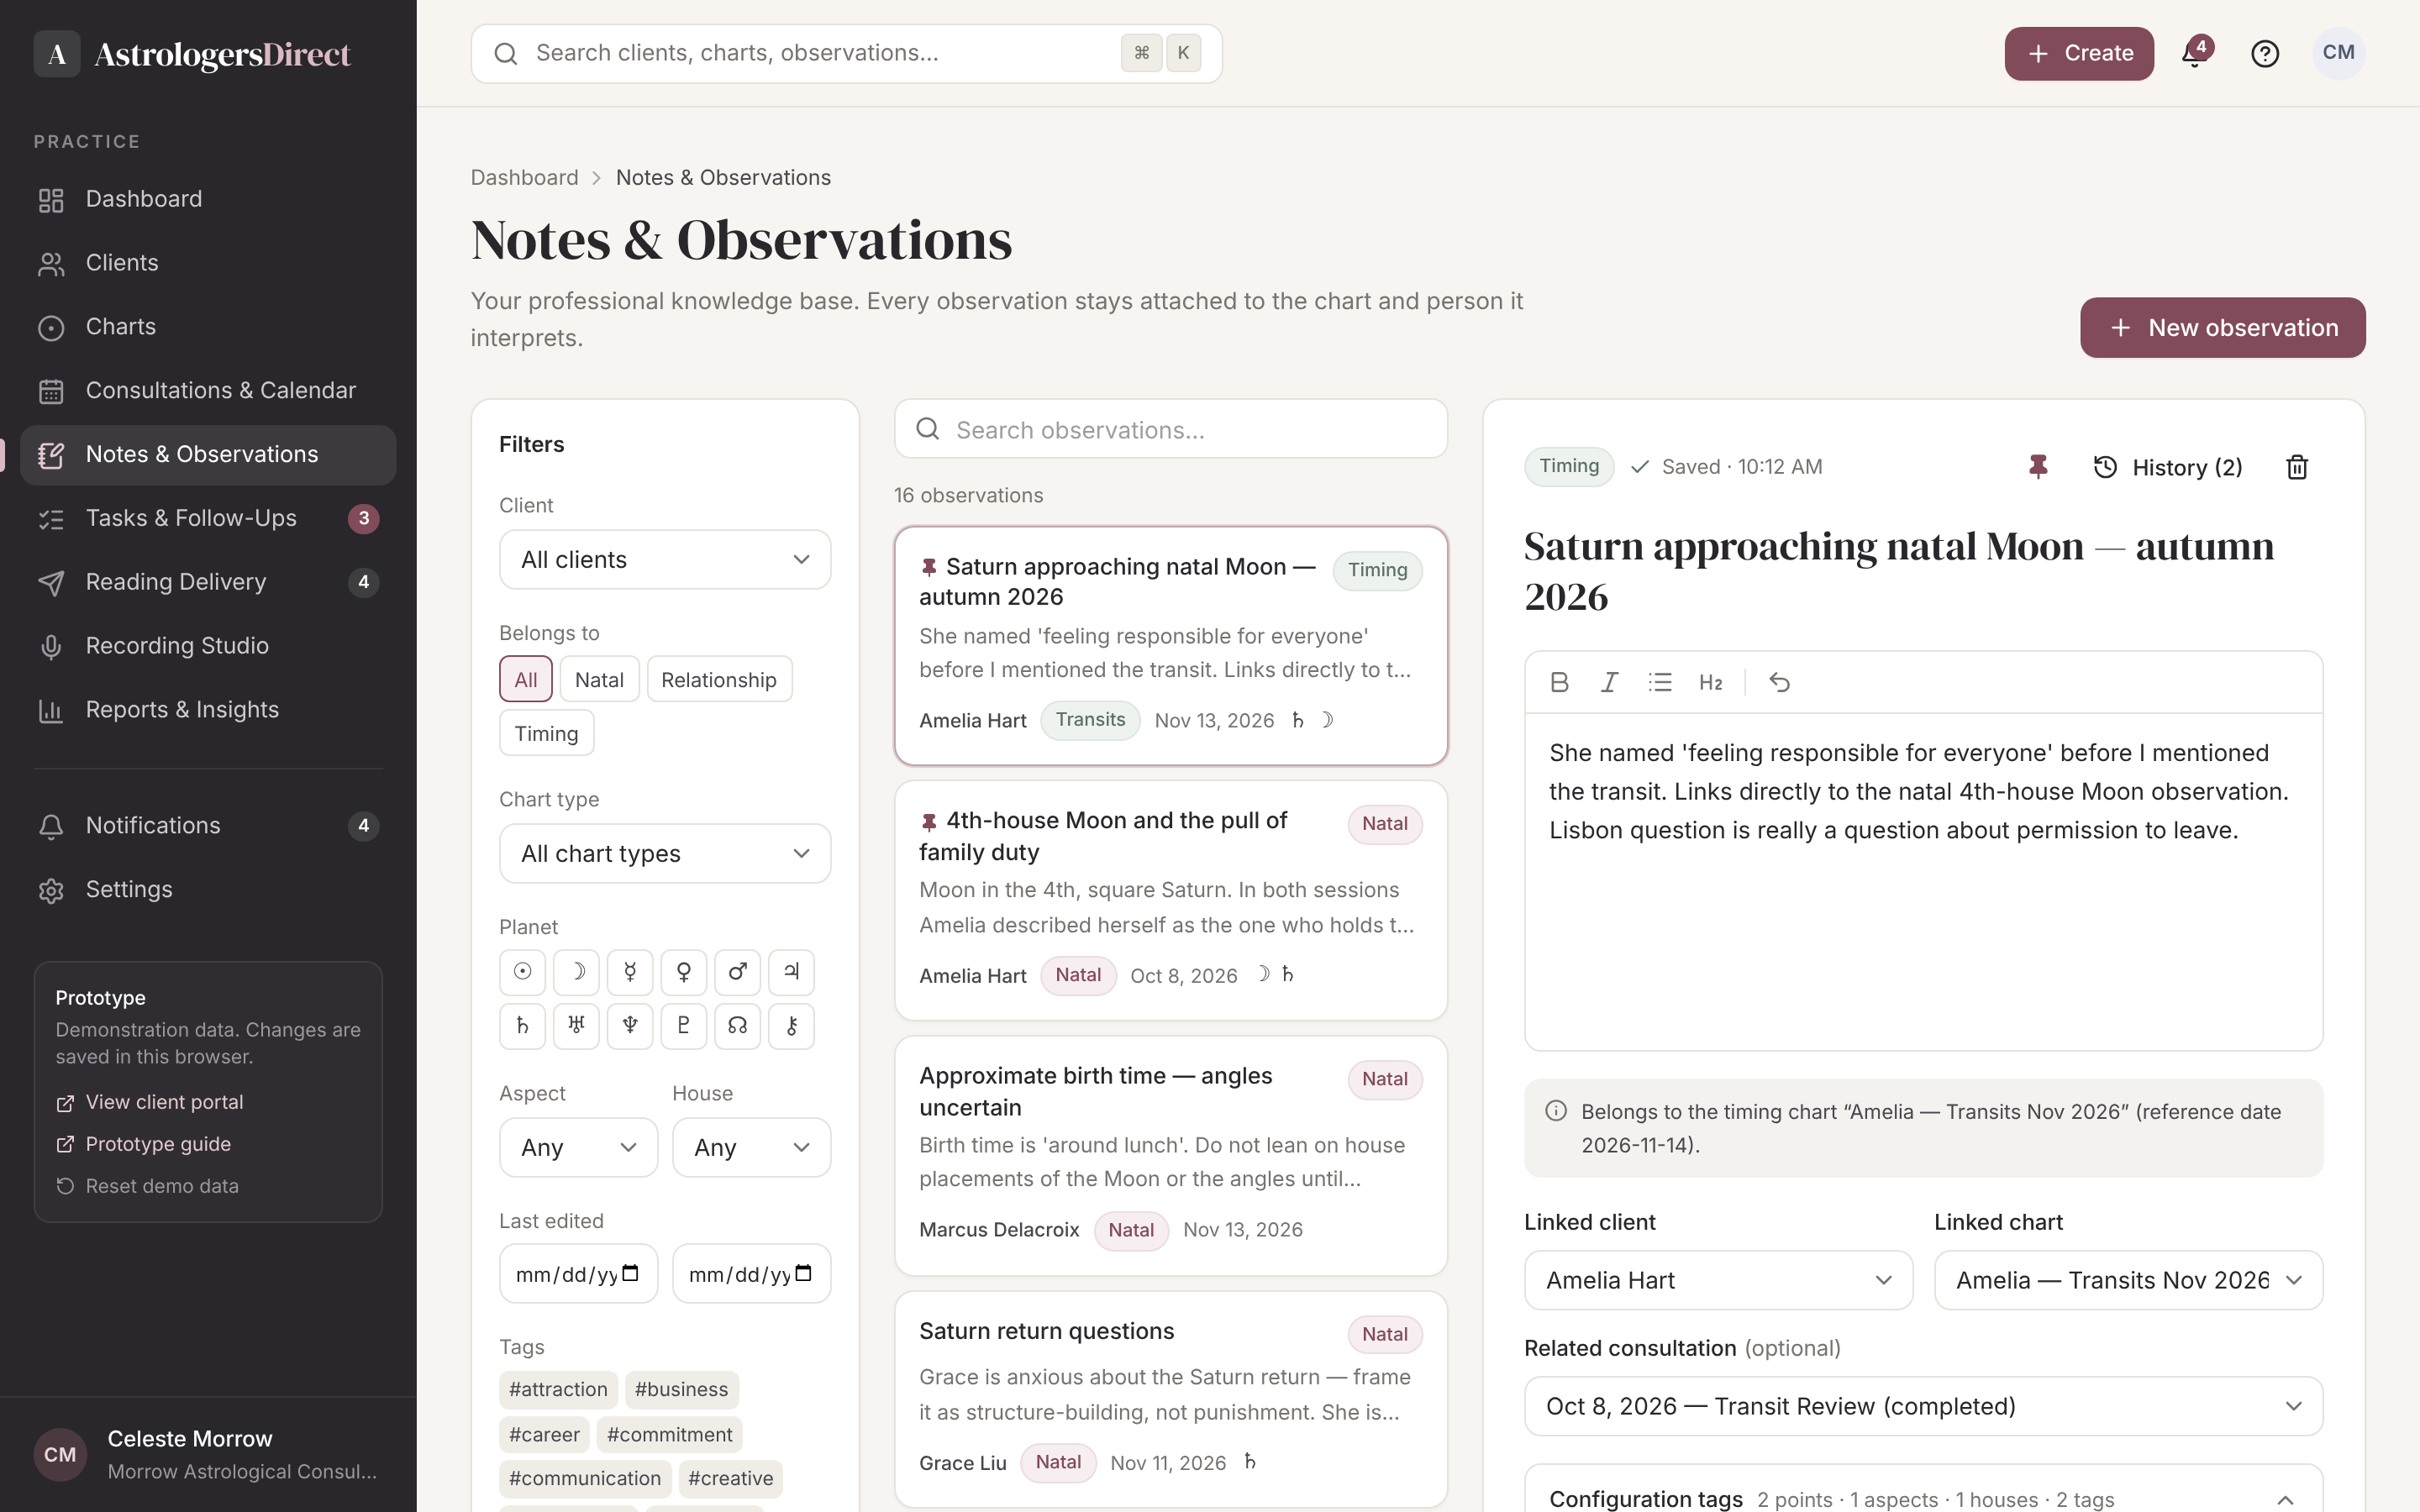
Save observations and consultation records
Write observations directly against the chart. They autosave, keep their revision history and are tagged by planet, aspect and house. Before and after each consultation, prep notes, session notes and follow-up tasks live on the appointment.
- Autosave and revision history
- Follow-up tasks created from the session
- Prep notes that surface what you wrote last time
- 4Step 4 of 5
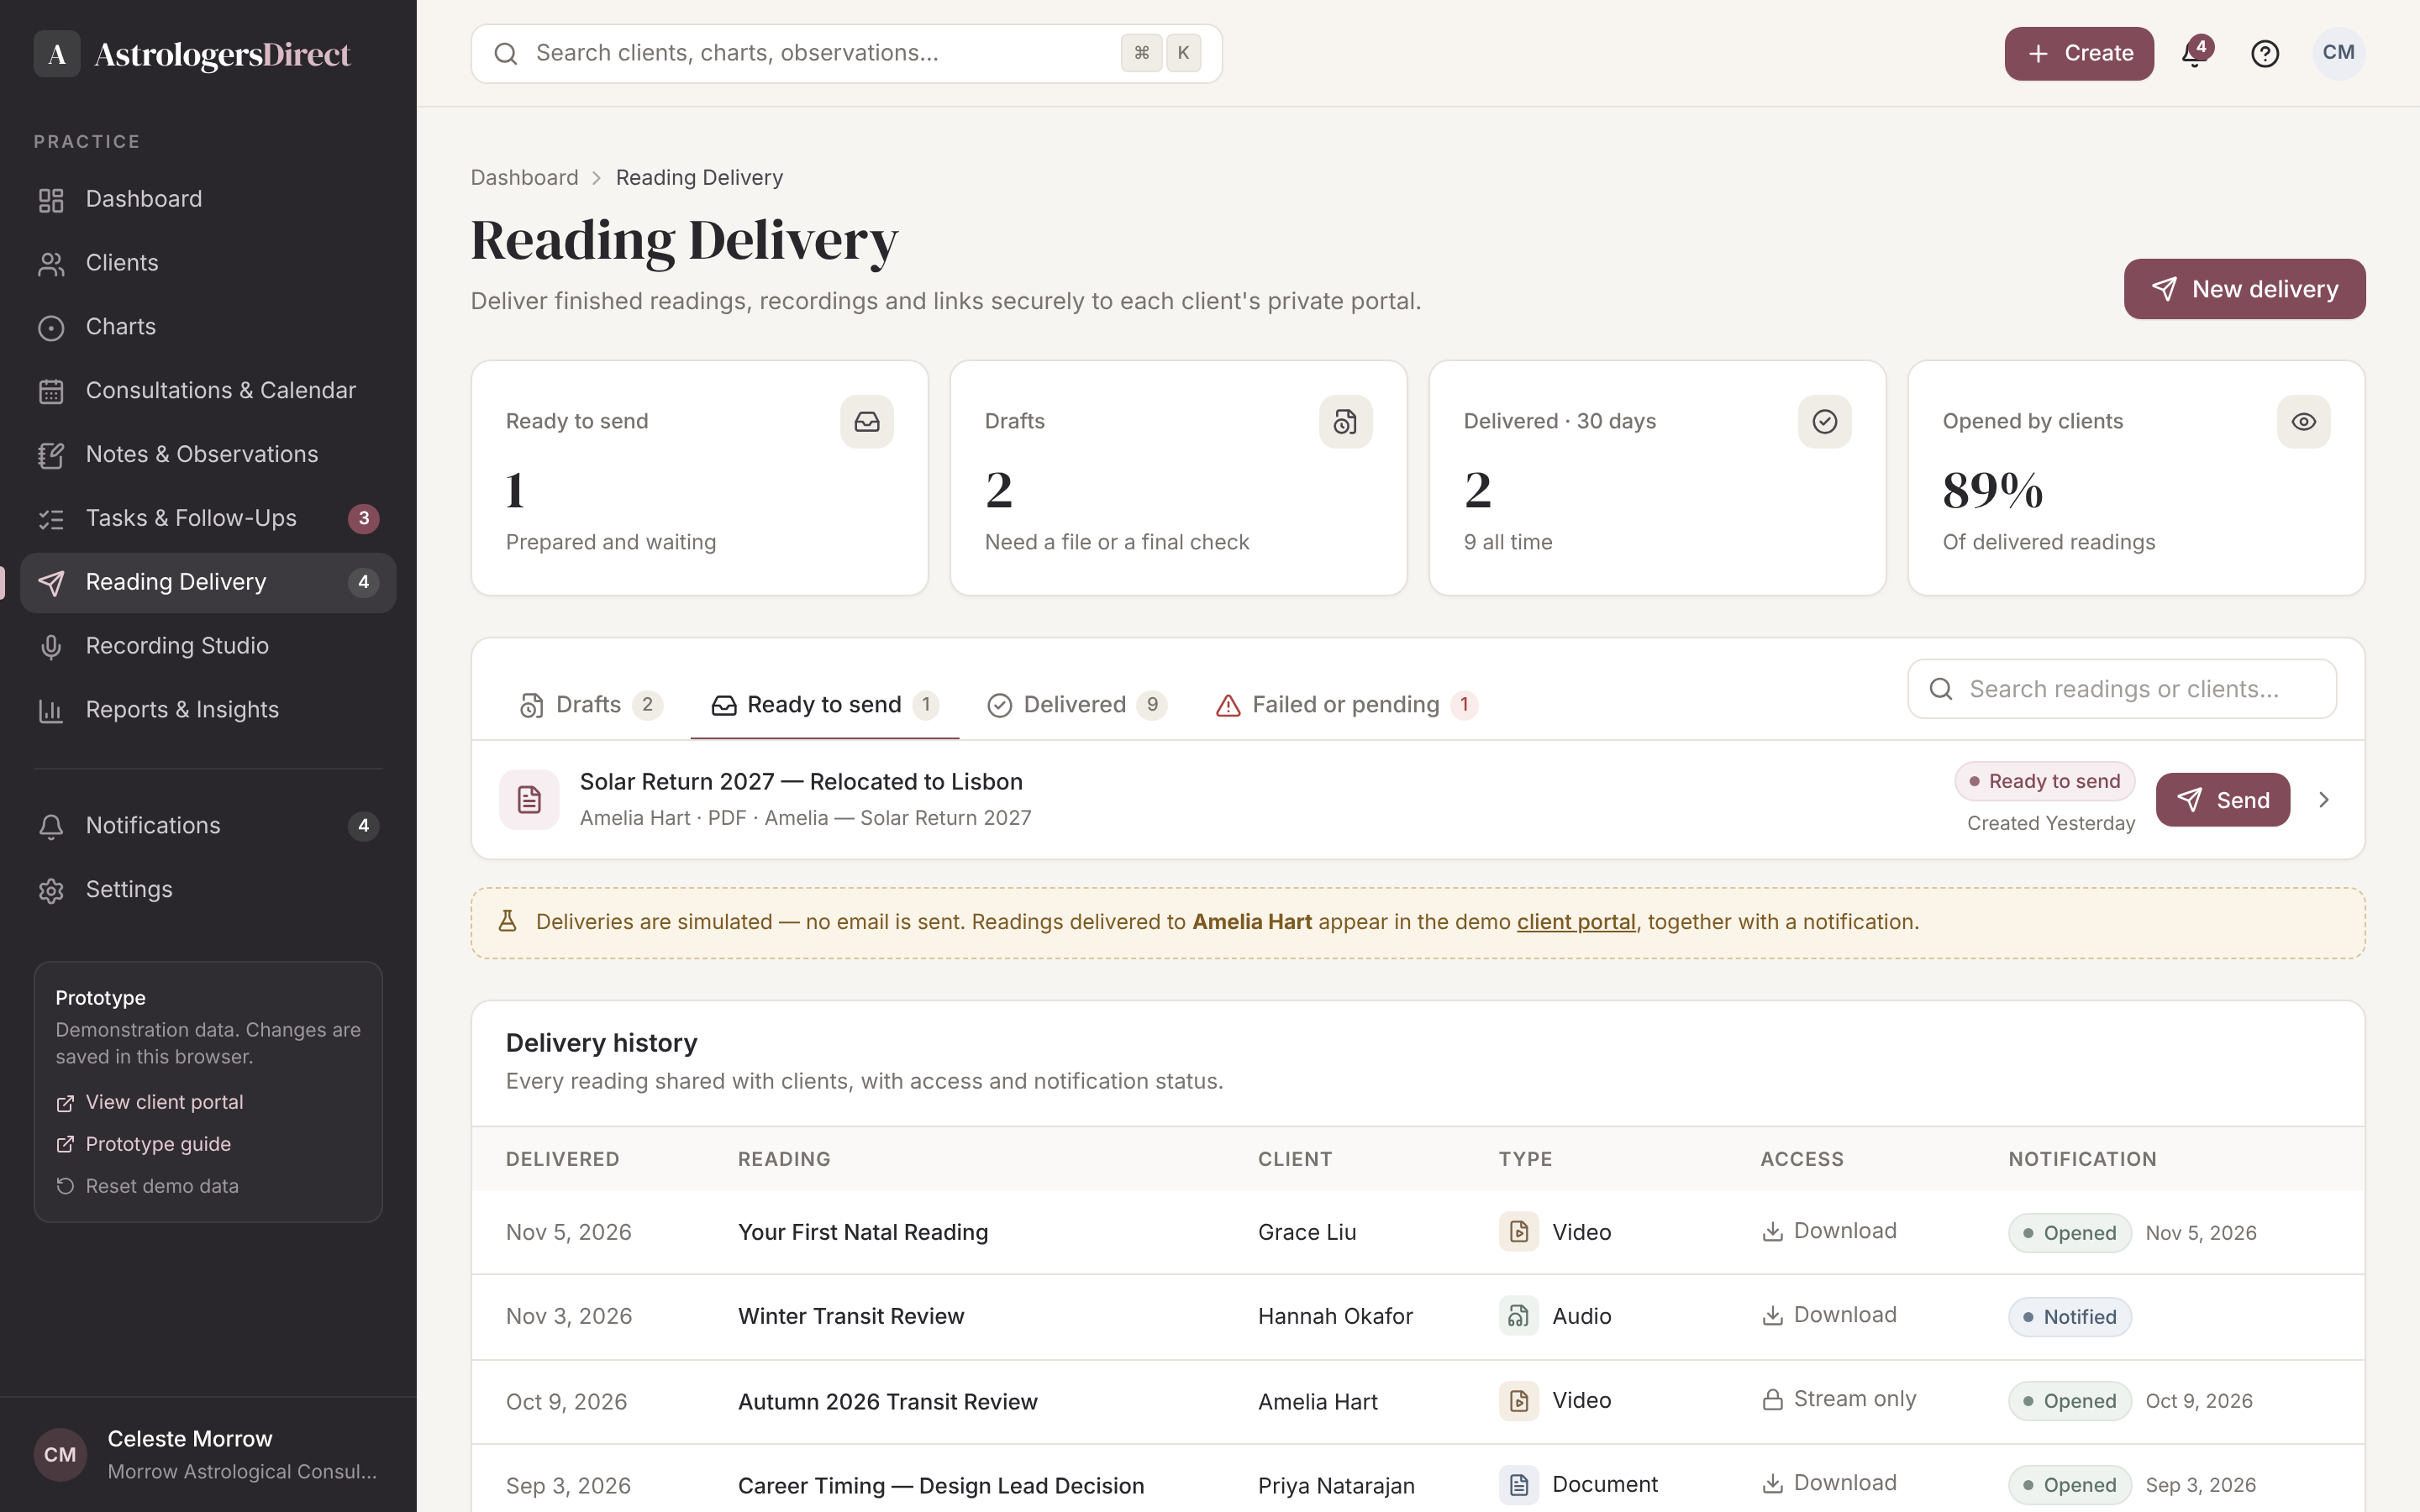
Deliver readings and recordings
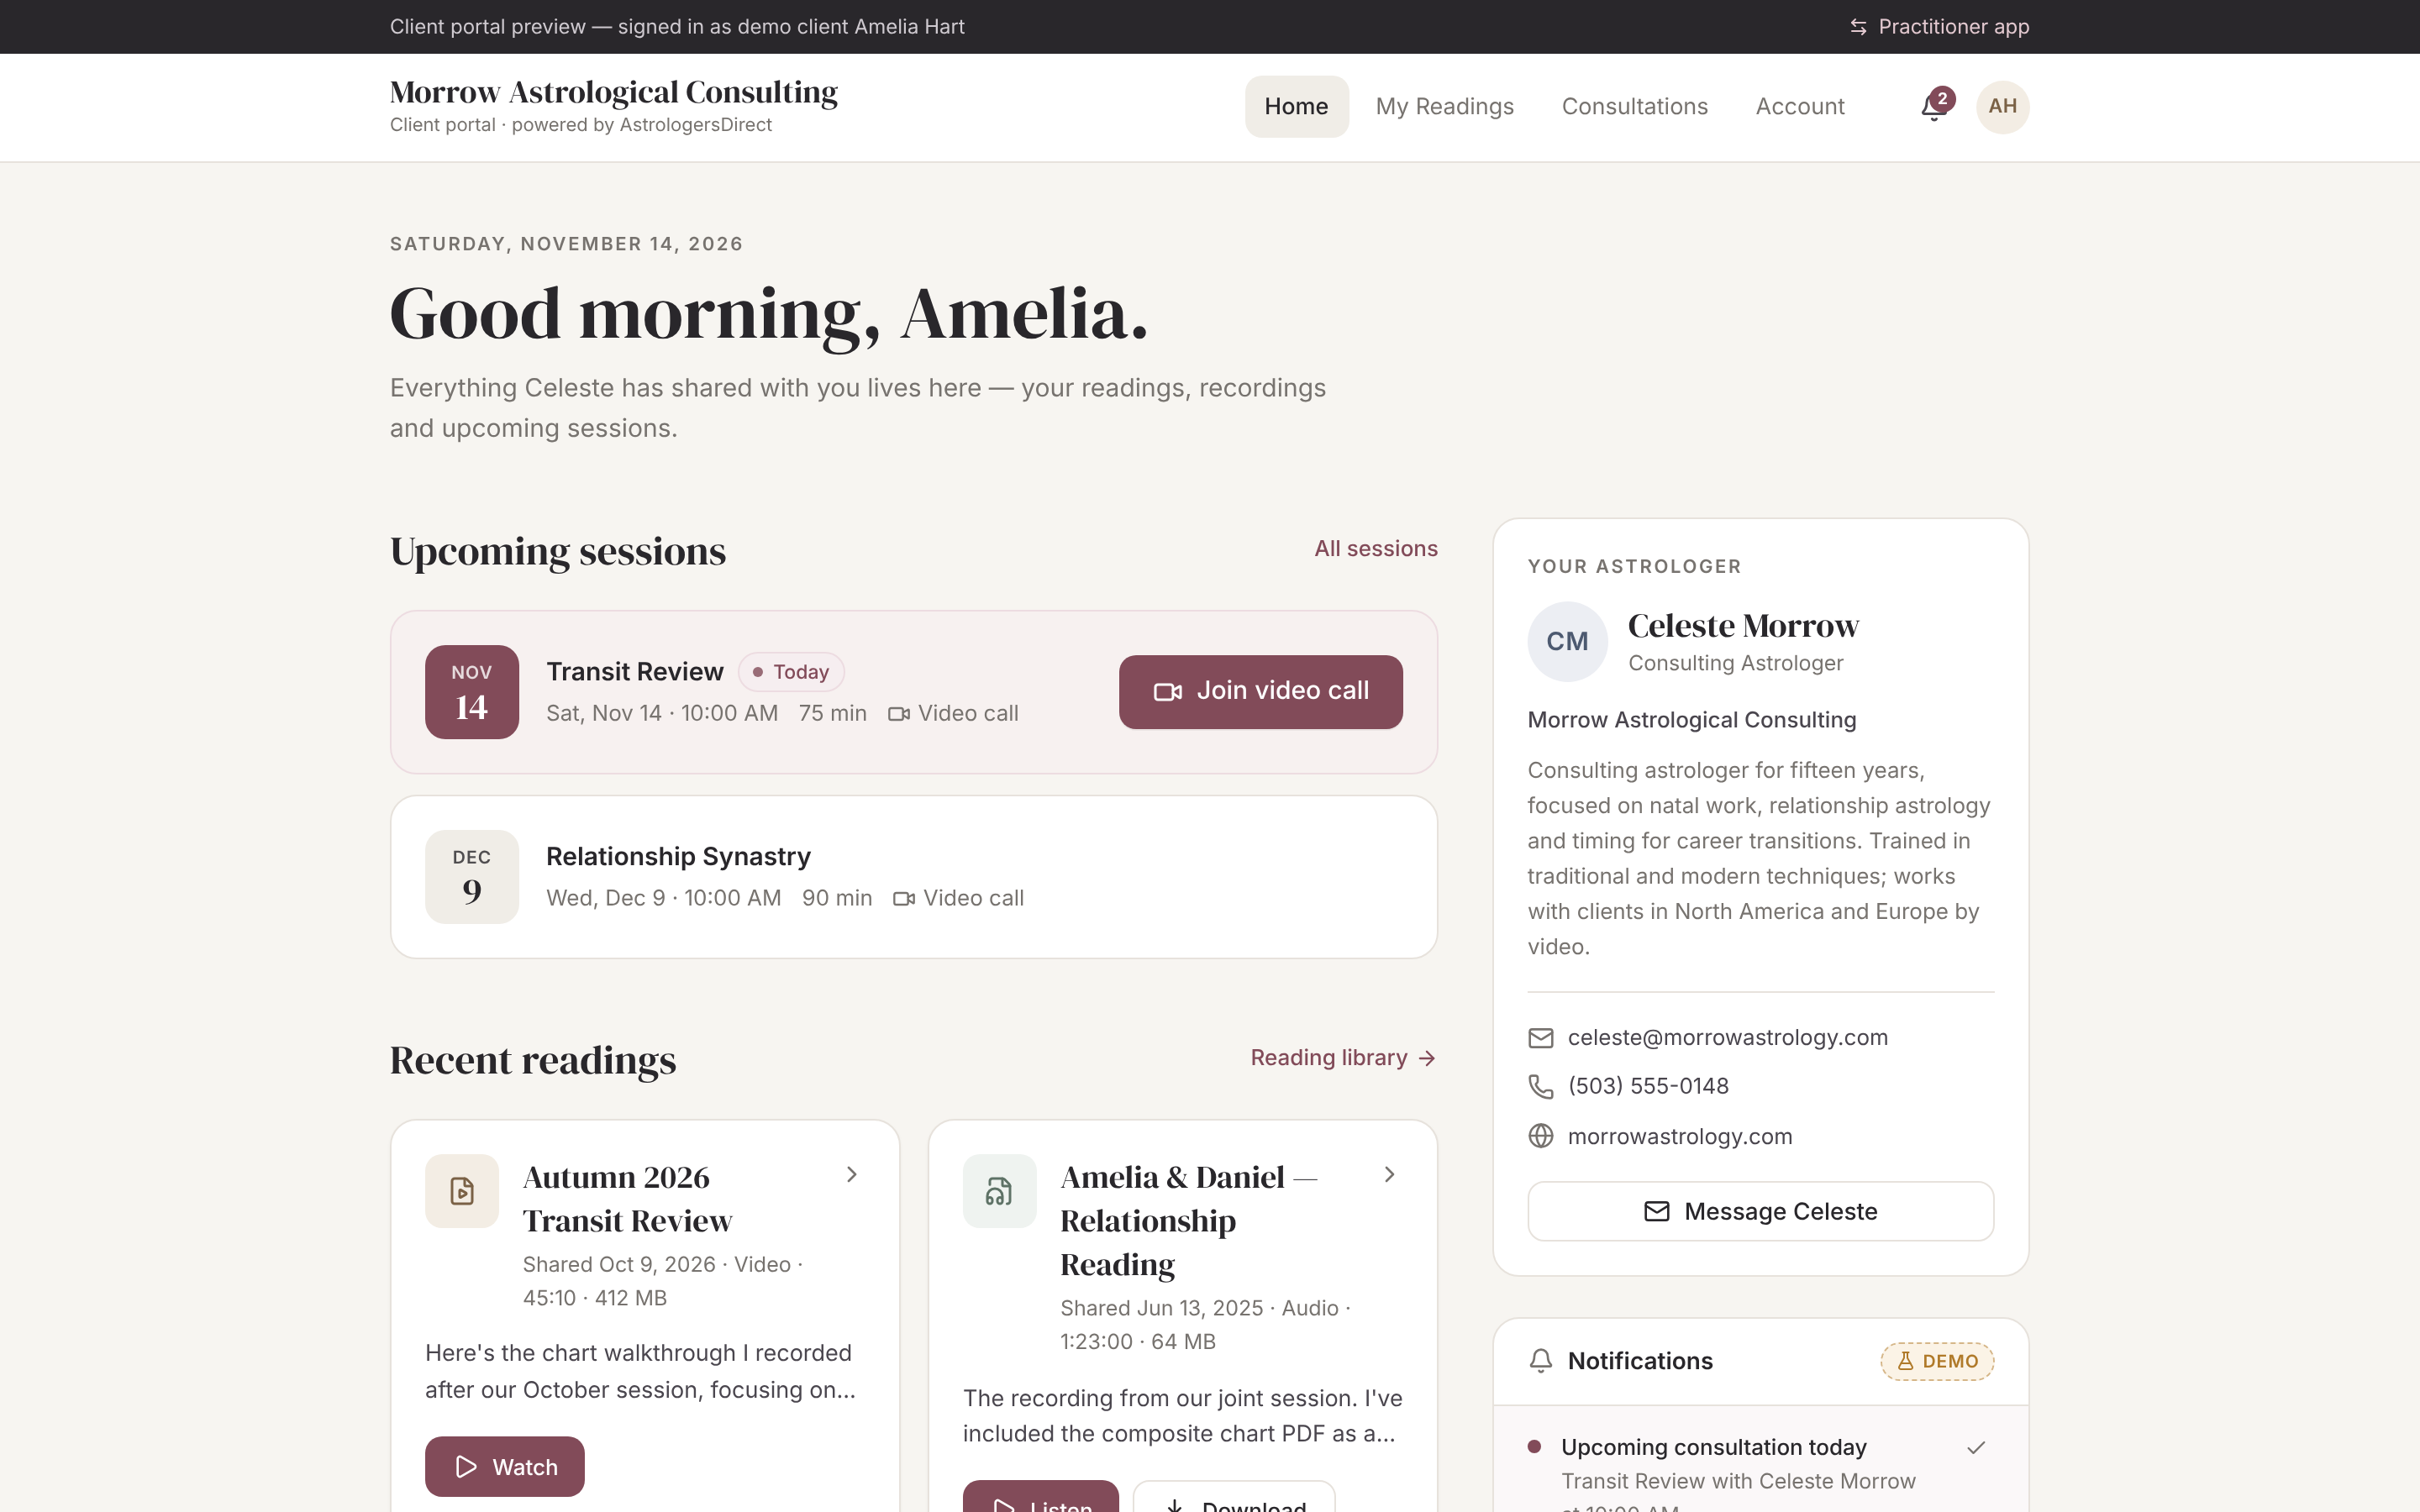
Upload a finished PDF, audio or video reading — or record one in the Recording Studio while navigating the chart. Add a personal message, decide whether downloads are allowed, preview, and send to the client portal.
- Upload, record or share a link
- Client notified automatically
- Opened status tracked
- 5Step 5 of 5
Build on the client’s history over time
When a client returns, everything is waiting: earlier charts, the observations you made about them, past consultations and every reading delivered. Clients have their own private portal with their materials.
- Complete consultation history
- Searchable knowledge across clients
- A calm, branded client experience
Your Practice. Connected.
See the workflow for yourself.
The prototype is fully navigable with realistic demonstration data. Start with the dashboard or follow a guided workflow.